Logins, logins, logins: How to use profiles in browsers

Photo by Andrea Piacquadio on Pexels.com

Why use profiles?

If you work in tech, specifically in a consulting or service provider role, you may find yourself logging in and out of websites to jump between Microsoft 365 tenants, domain registrar accounts, email accounts, and various other websites. Even if you are not working in tech, you may have multiple logins for the same site for different things, or multiple email accounts that have to be logged in and out of. For example, if you have a personal outlook.com account and a work or school account that uses Microsoft 365, you may find yourself trying to access email and finding you are in the wrong account.

Additionally, since web browsers are consistently getting “smarter” and storing credentials and cookies, if a browser is not fully closed or cleared, you may think you have logged into a different account but may still end up logged into an account that was previously logged in, causing review of inaccurate information, or even worse, changes to be made in the wrong account.

The below sections will show you how to create profiles in Google Chrome and Microsoft Edge, two of the most commonly used web browsers. The advantage to having separate profiles is that the cached credentials and cookies are separated between these profiles, so if you create a profile for “ABC Widgets” and use it to sign into the Microsoft 365 account for ABC Widgets, when you return to your own profile or the profile for “XYZ Financial”, it behaves as if you have never signed in to “ABC Widgets”.

Additionally, when using profiles, you can use the “keep me signed in” functionality of Microsoft 365 and other vendors. This allows you to open the profile in the browser and be already signed into the account for the site you are browsing to. Each profile can also have it’s own separate bookmarks, search history, saved passwords, and other settings.

Finally, you can also create a separate work and home profile in the same browser. If you are using a home computer for work purposes, this can help to keep the logins and activity separate from each other.

Setting up profiles in Google Chrome

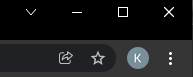
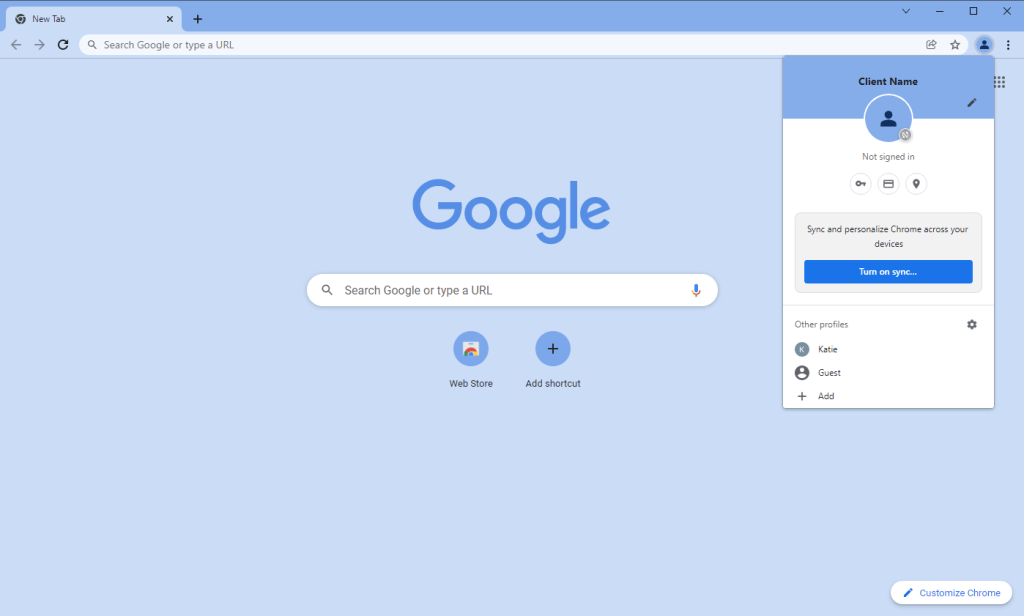
If you are signed into Chrome, there will be an icon with your image or initial in the top right. Click it to open a dropdown menu.

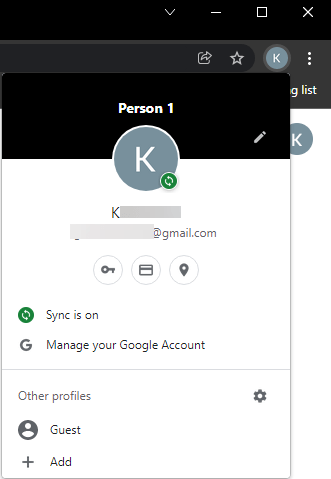
From the dropdown, click on the option for “add”

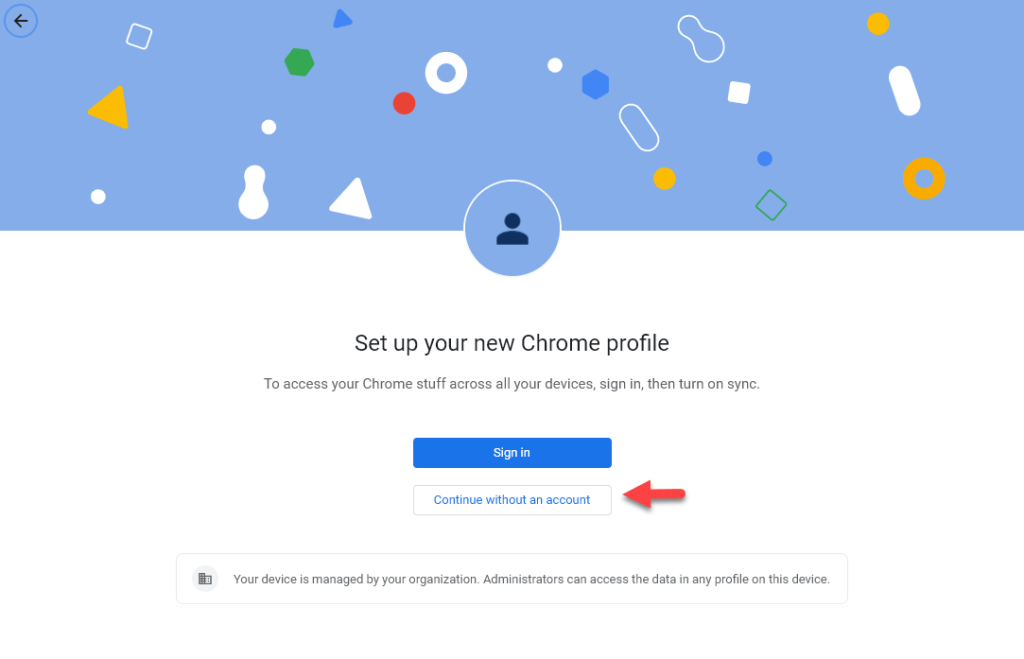
In the window that opens, select “Continue without an account”

(you may choose to sign in if you are creating a secondary google profile, perhaps if you have gmail at home and google apps for work.)

Give the profile a name, Set the desired theme color for the profile, and select if you want a desktop shortcut automatically created**

Tip: I use a dark grey or black theme for my own profile, and colors for any of my client profiles. This is a quick visual indicator of whether I’m in my personal profile or a client’s.

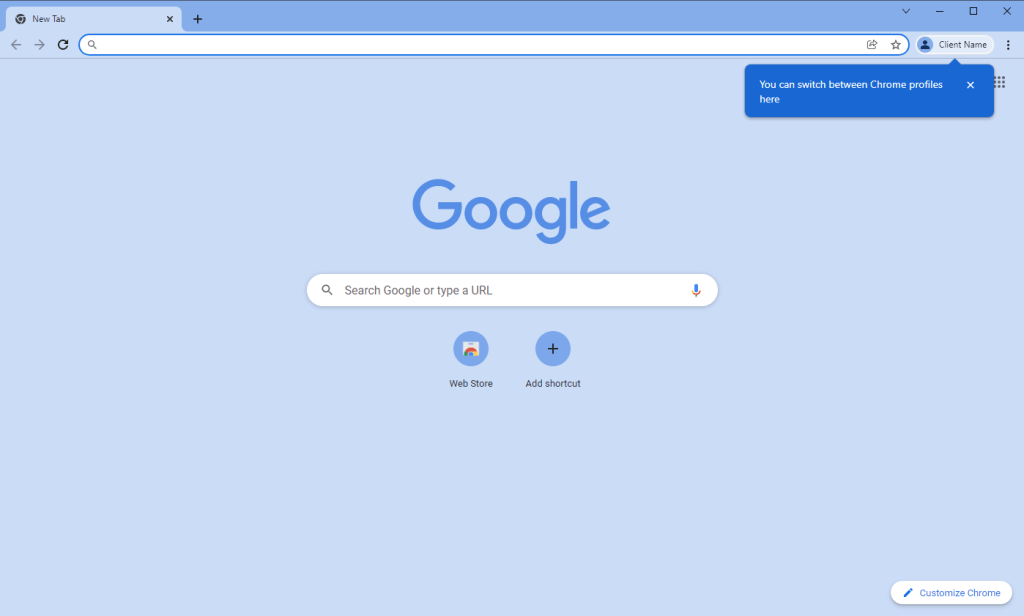
The new profile will open in it’s own new window automatically after you click done on the previous step.

Click in the same spot to view profiles, or open a new window in a different profile

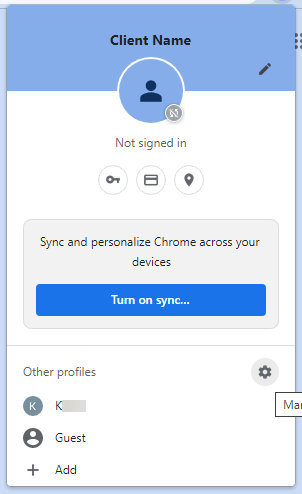
If you click on the settings gear in the dropdown menu, you can manage your profiles.

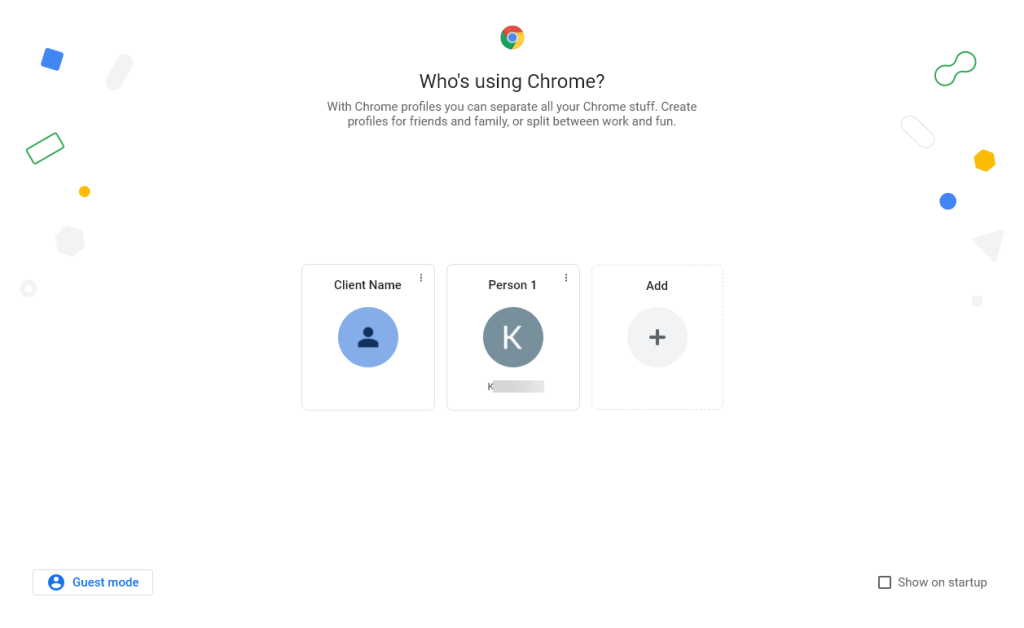
From these settings, you can add and delete profiles, select a profile to launch a new chrome window for, or select to show this window on startup.

If you select to show this window on startup, this window with the profile selector will be the first thing to open when you open chrome, allowing you to select which profile you want to use for that session

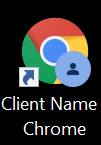
If you selected to create a shortcut, it will appear on your desktop with the profile name first. You can use this shorcut to quickly launch a chrome window into that profile.

You can also drag this to your taskbar to pin it for ease of access

Setting up profiles in Microsoft Edge

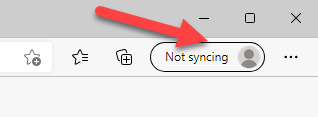
On the top right of Microsoft Edge, you will see a User icon. Click here to open a dropdown menu.

*icon and words will vary depending on how your profile is currently setup.

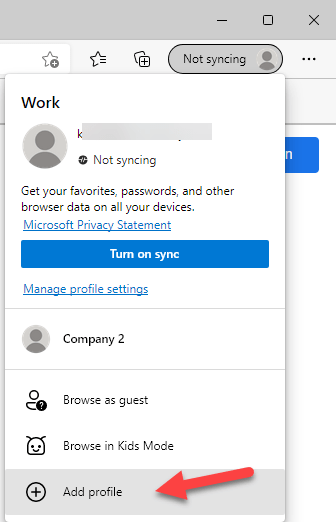
Click on “Add Profile” at the bottom of the dropdown menu.

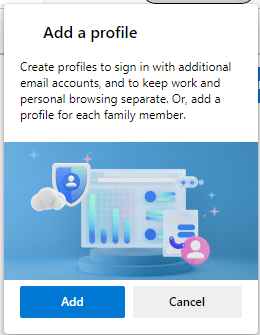
Click “Add” on the prompt

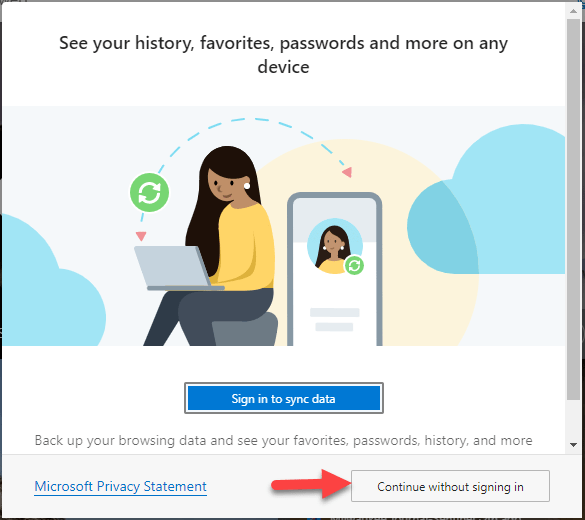
This will open a new edge browser in the new profile with an auto-generated description. Click on “Continue without signing in”

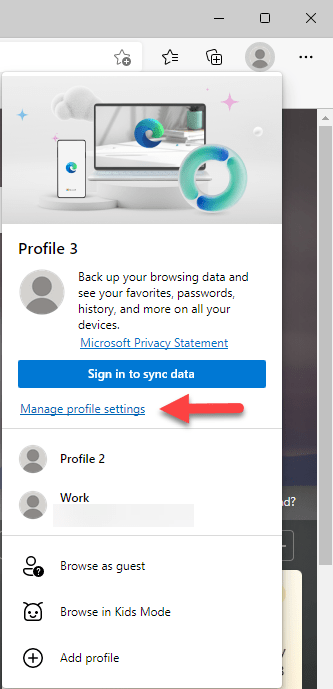
Click on the profile again to open the dropdown menu, and click the link for “Manage profile settings”.

Click on the elipsis (the three dots) and then select “edit” to edit the profile

You could also select delete if you no longer need the profile

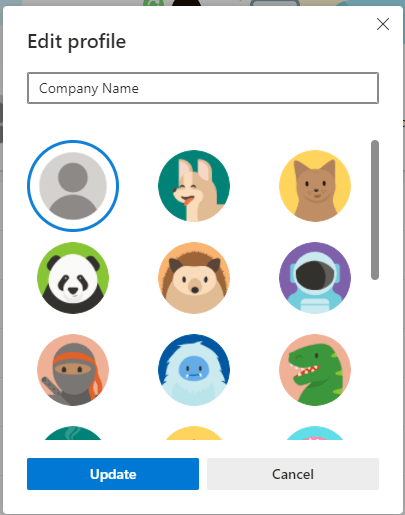
In the prompt, give the profile a name for easy identification. you can also give it an image to display as the icon.

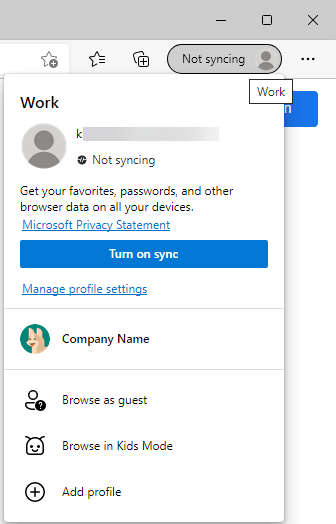
Now when clicking on the profile menu, the name and icon you selected are displayed.

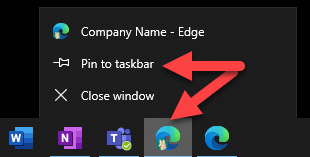
Additionally, with the profile open, you will have your primary profile which has no icon, and the one with the icon for the new profile in your taskbar.

If you right click this icon, you can select to “pin to taskbar” so even when it closes it remains there for ease of access.

Now go forth and login to multiple accounts with convenience!

Dear people who name products, do better.

I’m looking at you specifically Microsoft.

There seems to be a current trend in naming products using the same or very similar words. I get it, for brand association and search engine optimization, keeping it the same keeps the brand top of mind and search results, but the big headache with this for consumers is making sure they are getting and using the product they want.

Let’s look at an example of it done right. Sony PlayStation. The first PlayStation was just that “Sony PlayStation”. When the successor came along, they followed a logical path and went with “Sony PlayStation 2”, or the widely adopted PS2, and so on through the PlayStation 3 (PS3), PlayStation 4 (PS4), and the current generation PlayStation 5 (PS5). When Sony stepped into the handheld and mobile space, they went with the logical extension of PlayStation Portable, fitting right into their nickname branding with PSP. They then Released the PlayStation Vita, which was close enough to sound standard with their naming convention, but also differentiated enough that the consumer can easily tell the difference.

Our second example is a little less direct about their generations, but still done well, Nintendo. Their first “console” release in Japan only was the “Color TV-Game”. After this, they started putting their name in the console with the “Nintendo Entertainment System” (NES). They followed this with the logical “Super Nintendo Entertainment System” (SNES). These two logically named systems were followed with the “Nintendo 64” (N64). This may seem like a turn, but made logical sense from the technology side as the NES was an 8 bit system, the SNES was 16 bit, and N64 was their foray into the 64 bit space. From there they went to “Nintendo Game Cube”, “Nintendo Wii”, “Nintendo Wii U”, and the current “Nintendo Switch”.

I think Nintendo did this well with keeping their brand visibility by embedding Nintendo into the name itself, while having clearly distinct names between the generations, save the Wii vs. Wii U step in the wrong direction.

So lets get to the the challenge I have with Microsoft. Sticking with their game console naming, they stepped into the space with the Microsoft Xbox, which generally is and was just referred to as an Xbox. Their successor was named the Microsoft Xbox 360. Not super logical in any way, but differentiated enough for even the parents trying to buy these for Christmas to be likely to get the right version. When they were teasing their third generation, there was a lot of online discussion over what the name would be. Would they go Xbox 720? Xbox 1080? Xbox Infinity? Then the announcement came that they were naming it the Xbox One.

This is where I start to take issue with the naming. I can’t find any logic in a third generation console being named “One”. But the problem only gets worse from here. They then released some consoles that were not quite fourth generation called the “Xbox One S” and “Xbox One X”, providing smaller form factor and some performance upgrades, but still using the “Xbox One” generation of games. My initial problem with this was that the vast majority of non-Xbox users could not easily identify the difference from these, and I constantly got asked if there was even a difference. Also, “S” and “X” sound way to close when spoken and it was hard to explain that “S like Sierra” is the newer low end entry into the space, and “X like X-ray” is the high end with support for 4K. Totally makes sense right? (I briefly forgot this is text, that question is definitely sarcasm).

For their final and most egregious violation in this train of naming, their current generation console is the Xbox Series S and the Xbox Series X. In just typing that, it took me three times to get it right. They took the most egregious violation in their letter choice from the previous generation, and doubled down by changing “One” to “Series”. So the lineup looks like:

  • Xbox One
  • Xbox One S
  • Xbox One X
  • Xbox Series S
  • Xbox Series X

With minor and major differences between each of these, if a person went into a store looking to purchase one of these as a gift, not being a Xbox user themselves, I suppose there is a 20% chance they would buy the model that the recipient wanted.

I’ll stop with the exposition for a moment here, and just give a side by side example of operating system naming conventions so that you can draw your own conclusions on these.

Year Android OS (Google MobileOSX (apple desktop)Windows (Microsoft Desktop)
Pre-
1990
Windows 1.01 – Windows 2.11
1990 -1994Windows 3.0 – Windows 3.5
Windows NT 3.1 – Windows NT 3.5.1
1995Windows 95
1998Windows 98
1999Windows 98 Second Edition
2000Windows 2000
2000Windows Me
2001Mac OS X 10.0 and Mac OS X 10.1Windows XP
2002Mac OS X 10.2
2003Mac OS X 10.3
2004Mac OS X 10.4
2006Mac OS X 10.5
2007Windows Vista
2006Mac OS X 10.6
2008Android 1.0
2009Android Cupcake
Android Donut
Windows 7
2010Android Eclair
Android Froyo
Mac OS X 10.7
2011Android Gingerbread
Android Honeycomb
Android Ice Cream Sandwich
2012Android Jelly BeanOS X 10.8Windows 8
2013Android KitKatOS X 10.9Windows 8.1
2014Android LollipopOS X 10.10
2015Android MarshmallowOS X 10.11Windows 10
2016Android Nougatma OS 10.12
2017Android OreomacOS 10.13
2018Android PiemacOS 10.14
2019Android 10macOS 10.15
2020Android 11macOS 11
2021Android 12macOS12Windows 11

A final word for Microsoft, and now I’m going to bring in acronyms which could be an entire post of it’s own. Microsoft 365, Office 365 and Azure all have a number of things that all include those words or numbers, making it not so straightforward. The particular example I will give is regarding Active Directory and their implementation of this in the 365/Azure space.

  • First there was Active Directory when you hosted it on your server in your network. Most of the IT people have called it just AD.
  • Then came Azure Active Directory when you were able to have this identity service in the cloud. Microsoft references this as AAD.
  • To connect these two, you have Azure Active Directory Connect, abbreviated by Microsoft AADC.
  • Then there is the full featured Azure Active Directory Domain Services, abbreviated by Microsoft as AADDS.
  • Now to differentiate between the on premise full feature, you also need Active Directory Domain Services, which Microsoft abbreviates as ADDS.
  • Finally, if you want to federate your connection between ADDS and AADDS, you will need Active Directory Federation Services, abbreviated by Microsoft as ADFS.

All in all, that is AD, AAD, AADC, AADDS, ADDS, ADFS. This doesn’t even get into the tangential services of PIM, PAM, MIM, MAM, MEM, MDM, or IAM.

Based on those acronyms, good luck finding the article that is relevant to the particular flavor of active directory or identity management that you are researching….

*for those of you who stuck around and want to know what those last acronyms are, in order of appearance: Privileged Identity Management, Privileged Access Management, Microsoft Identity Manager, Microsoft Application Manager, Microsoft Endpoint Manager, and Mobile Device Management. All of which are in a very similar technology space of Identity and Access Management.

Flexing your Powershell: Bulk AccessTier modification for Azure Blobs

Credit where credit is due, first of all. This post would not be possible without HEAVILY (and by heavily I mean stealing everything but a single parameter modification) referencing https://webmakers.co.nz/how-to-convert-entire-data-in-a-blob-storage-from-cool-storage-tier-into-archive-access-tier/, so please go check that out so he gets the credit. 

Feel free to now skip to “The Command” if you don’t want the explanation of how I got here and why it works.

Backstory

We setup Azure storage and put a metric ton of data into it, organized into folders. Unfortunately, our cost projections were way off and we were bleeding money to Microsoft for the storage. This is a byproduct of our first foray into storing data natively in Microsoft Blobs on this scale. We were able to change the storage type to minimize this cost a lot, but knew that modifying the AccessTier on a subset of the data that is not regularly accessed would bring us back to the ballpark we expected.

We have two containers, lets call them data1 and data2, each with subfolders within subfolders within subfolders. We did not have this organized so that one container could be “cool” storage and one “hot”. All Containers were set to “Hot”, and we needed a single root “folder” (I’ll explain the quotes in a minute under The Breakthrough) within a container changed to cool, while the others remained hot.

Issue

You can modify the AccessTier on an entire container, or a single “file”, but not on a folder of files. Or so it seemed like from everything we were seeing (and the command provided in https://webmakers.co.nz/how-to-convert-entire-data-in-a-blob-storage-from-cool-storage-tier-into-archive-access-tier/ (seriously, click on that and give my source a reference). Additionally the folders turned out to not be anything usable to filter the selection.

The Breakthrough

In troubleshooting another issue I was having in getting powershell to load the right modules and run them correctly, I stumbled on a comment in a post about the “folders” in containers and blobs. It tickled something in my brain, but didn’t click all the way into place yet. I wish I still had that page open, but seeing as I read through 30 or more posts about this, I doubt I’ll ever find it again to reference it. My deepest apologies, and I promise I will edit this if I find it.

What it explained is that the folders are not folders in the traditional Microsoft Windows sense. Blob storage is a flat file system. The folders are just the filenames, and Azure parses them into displaying them into folders. So in collection “data” there is rootfolder\subfolder\file.txt, that is an actual file name. If windows handled files this way, and you wanted to use a command prompt to “cd” (change directory) into the users directory, it wouldn’t work.

I hope that makes sense.

The command

All that explanation aside, below is the command modified to pull only files from RootFolder1 and change them to the “cool” tier. If you had RootFolder2 and RootFolder3, they would remain the Access Tier they currently are. Items in bold need to be from your account.

Install-Module -Name AzureRM
Set-ExecutionPolicy -ExecutionPolicy RemoteSigned
Import-Module AzureRM
$StgAcc = “YourStorageAccountName”
$StgKey = “YourConnectionKey”
$Container = “YourContainerName”
$ctx = New-AzureStorageContext -StorageAccountName $StgAcc -StorageAccountKey $StgKey
Connect-AzureRmAccount
$blob = Get-AzureStorageBlob -Container $Container -Context $ctx -blob RootFolder1*
$blob.icloudblob.setstandardblobtier("Cool")

*after “Connect-AzureRmAccount” you will be prompted for a username and password to connect to Azure.

Recommendation:

After line 9, you can enter $blob to see what is stored in that variable. I did this to ensure it only pulled the files I wanted to change. It also shows the AccessTier. I ran it again after line 10 to verify the AccessTier changed.

Second Example:

If you want to make changes on a subfolder of a root folder, or a folder four levels deep, the modification is just to the -blob parameter. Say in “YourContainerName” there is folder strucure “RootFolder1\subfolder1\sub subfolder\” you would modify the -blob parameter as follows (note that the folder structure has a space, so requires the quotes:

Install-Module -Name AzureRM
Set-ExecutionPolicy -ExecutionPolicy RemoteSigned
Import-Module AzureRM
$StgAcc = “YourStorageAccountName”
$StgKey = “YourConnectionKey”
$Container = “YourContainerName”
$ctx = New-AzureStorageContext -StorageAccountName $StgAcc -StorageAccountKey $StgKey
Connect-AzureRmAccount
$blob = Get-AzureStorageBlob -Container $Container -Context $ctx -blob "RootFolder1/subfolder1/sub subfolder/*"
$blob.icloudblob.setstandardblobtier("Cool")

Additional helpful notes, maybe

YourStorageAccountName  – open the Azure portal and go to “storage accounts”. the “Name” of the accounts your containers are in is what is used here.
YourConnectionKey  – once you have your storage account open, go to “Access Keys” under settings, this is the super long and complicated string under “Key”
YourContainerName – same page you are already on, scroll down to “container” under Blob Service. This will be the “Name” that contains the data that you want to work with.

The Saga is Complete

And with that I will go home, plug in my computer and let powershell change the AccessTier of a couple thousand files while I get some food and melt my brain with junk TV shows.